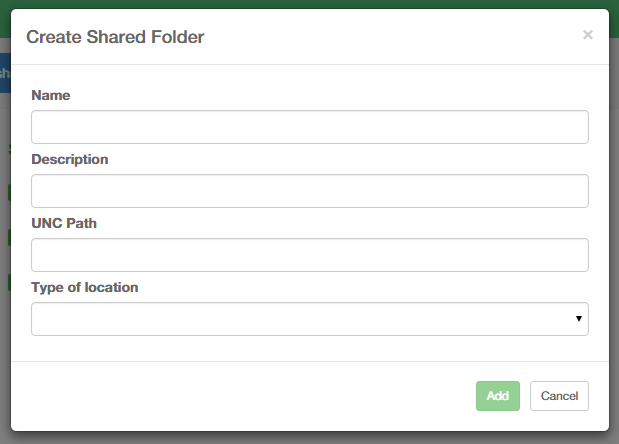
6. Intella Connect Dashboard
The Intella Connect Dashboard is the administrative part of Intella Connect and enables the administrator to share cases, define users, index cases remotely, view the activity stream from shared cases and modify the general settings of Intella Connect.
6.1. Toolbar
Clicking on the user’s name in upper right corner allows user to change the password or log out from Intella Connect:
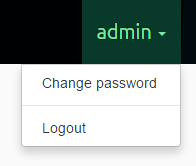
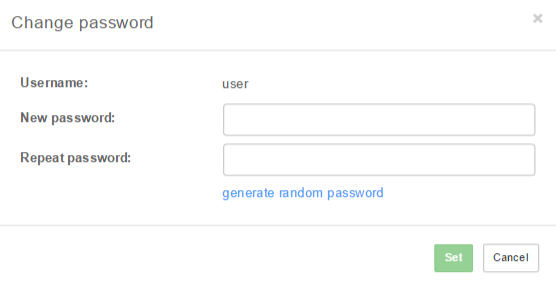
To change password, select Change password from the menu.
Once the password fields are filled in, click on the Set button to change the
user’s password. After changing the password, you will be asked to log in with new password.
Note
Passwords can be generated by clicking on the generate random password link.
The left-side menu divides the administrative part into the following parts:
6.2. Cases
The Cases view contains following subviews:
- List view
- Activity view - gives detailed view about the activities performed by users logged into a case.
The List view shows the list of cases prepared by the Intella desktop product or Intella Node. For each of the cases it also shows its status, which can be:
- not shared: the case is not shared.
- shared: the case is currently being shared and accessible by reviewers.
- indexing: the case is currently being indexed by one of registered Intella Nodes.
- indexing finished: the indexing operation has finished and case is still open by Intella Node.
- converting: the case is currently being converted by one of registered Intella Nodes.
- conversion finished: the conversion operation has finished and case is still open by Intella Node.
- locked: the case is currently used by another Intella process, e.g. the Intella PRO desktop application.
Note
A case can also be without a status, which means that it is not available. The reason for this can be that the directory where the case files used to be, is no longer accessible.
Clicking on a case shows its details on the right side, along with a set of buttons depending on status of the case:
- Share: shares the case, which will be accessible via the URL shown in the
Case URLfield in the case details. - Authorizations: allows to assign users to various roles.
- Stop sharing: stops sharing of the case (visible only for shared cases).
- Delete case: removes the case from the list and optionally also from the disk.
- Convert: allows to convert a case to a newer format supported by the current version of Intella Connect (visible only if a conversion is required and possible)
- Sources: opens up *Sources* page where sources can be added, removed and (re)indexed.
6.2.1. Creating new case
Creating a new case in Intella Connect is straightforward.
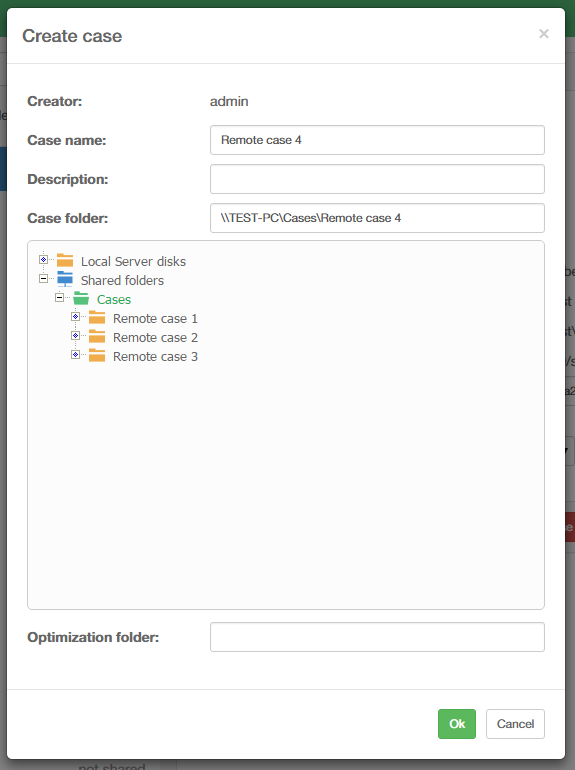
After pressing Create case button located at the bottom of the cases list the Create case dialog will be shown.
Please populate the form with case name, case description (optional) and desired absolute path to the case folder.
Optionally you can specify also Optimization folder. The optimization folder can be used to speed up indexing by distributing certain database files during indexing across the case folder drive and the optimization folder drive.
Important
Assuming that Intella Node is installed on different computer than the one running Connect, it is possible to have Case and Optimization folders reside on computer which is running Connect. You will need to use network path instead of local path to be able to index evidence which does not reside on local disk with Intella Node. To be precise, you will need to use network path when creating case (Case folder field and Optimization folder field are the ones, which will need network path).
After you’ve entered all data, press Ok button. You will be presented with *Sources* page
of newly created case where you will be able to add and index newly added sources.
6.2.2. Adding an existing case to the list
If you have existing case on the disk which is accessible to Intella Connect,
then you can manually import it to the available cases list. In order to do
that you will have to provide a path to the Case Folder (parent folder
of a case.xml file).
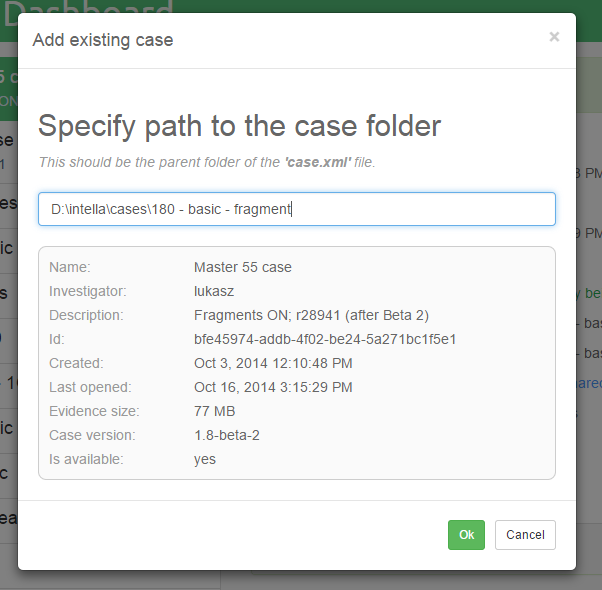
Click on the Add case button located at the bottom of the cases list. In the
modal window, please type in the absolute path to the case folder. It’s the
best to copy and paste it directly from Windows Explorer window. The server
will then analyze provided path and if the case is found in that location, it
will render basic details about the case. This is presented on the image
below. If provided path is invalid, then appropriate message will be shown.
Note
Case with same location cannot be added multiple times. In an attempt to add case to the list when case with same location is already present in cases list, a message will be shown highlighting the case with same location.
Intella Connect can also be configured to add cases automatically. For more information see General settings section.
6.2.3. Deleting an existing case from the list
Click on the Delete case button located at the bottom of the selected case details panel.
In the modal window, leave the checkbox empty if the case should only be removed from cases list.
Check the checkbox if the case should be removed from cases list as well as from disk.
6.2.4. Case Sources management
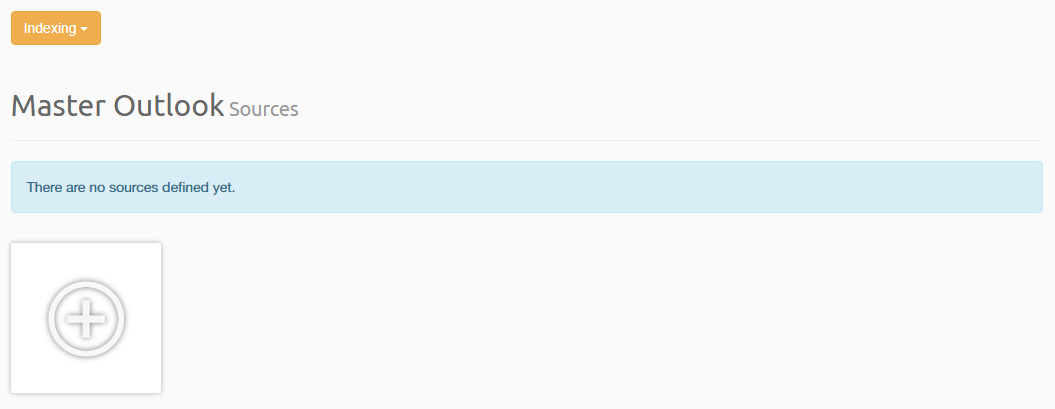
You will be presented with this part each time new case is created or after Sources button in the case details panel is clicked.
Using this view it’s possible to:
- Add new sources.
- Edit sources.
- Remove sources.
- Re-Index entire case.
- Index new data.
- Import an overlay file.
- See overlay file import statistics.
- See latest indexing statistics.
- Close case which was previously opened for an indexing operation.
6.3. Remote servers
6.3.1. Intella Connect Grid
If you are running more than one Intella Connect servers then likely you could benefit from configuring them as a part of the same Grid. This feature allows reviewers to have a single point of entry to all Intella Connect servers. This simplifies case management in larger organizations, as reviewers do not need to be aware which Intella Connect server is hosting the case.
For this feature to work, each server forming a Grid must have LDAP integration enabled. This is required to establish a consistent user base for each of the servers.
Note
Each server in Intella Connect Grid must be configured to reuse the same LDAP provider. Not doing so can lead to potential authentication/authorization conflicts.
It’s imperative to manually pick one server which will act as a single point of entry for the Grid and apply any configuration there. Other Grid servers do not need to be further configured (assuming that LDAP configuration was already applied).
It’s common in networking to identify servers interchangeably by their IP, domain or network name (ex. IP 1.1.1.1 matching pc1.mycompany.com). However when Intella Connect server is being added to the Grid only one URL will have to be provided and will be used as a unique identifier of the server. For security reasons these URLs will be used internally to validate the origin of requests accepted by Grid servers. Therefore the grid might not work properly if you set up a server using it’s IP address and then later are accessing it using its domain name.
Note
When adding a server to “Known servers” list make sure to use the URL under which it will be accessible to reviewers.
The same rule applies to the server which acts as a single point of entry. You must make sure to apply any grid configuration using the URL which will later be used to access user dashboards.
Note
When user is accessing his dashboard he will see all cases in Grid which are currently shared with him. If he decides to open one, he will still be redirected (HTTP 302) to the appropriate server. The data hosted by servers is not proxied through the server which acts as single point of entry. This is deliberate behavior which means that at all times reviewers need to be able to communicate with grid servers on a network level.
Example
This example will walk you through the hypothetical use case of setting up Grid in a company distributed across three continents. It gives you some general guidelines how to approach this task and stresses points which should be discusses with your IT department.
Let’s say that we have three Intella Connect servers running in our company. Here are their details:
- Server1; IP=1.1.1.1; domain=connect.mycompany.com; Location: London
- Server2; IP=2.2.2.2; domain=newyork.mycompany.com; Location: New York
- Server2; IP=3.3.3.3; domain=sydney.mycompany.com; Location: Sydney
Until now there was no strict policy as to how to access those servers so users were using different mix of IPs or domains. The first step is to define a scheme of addressing our servers. We decided to rely on domain/subdomain names as IPs are too fragile to rely upon them. We also decided to promote the Intella Connect server located in London to become our single point of entry. We also asked our IT department to disallow direct access to server by IP (as an additional precaution).
In the next step we went through all three servers and made sure that each one of them is using the same LDAP provider. It turned out that the one in New York had a bunch of local accounts which were interfering with LDAP (username clashes) so we decided to clean this up and create LDAP accounts for those people.
After that we logged in to connect.mycompany.com (entry point) to set up Grid there. Under Remote Servers > Intella Connect Grid > Known servers we added the remaining two servers. The first one as:
- Name: New York
- URL: http://newyork.mycompany.com
And the second one as:
- Name: Sydney
- URL: http://sydney.mycompany.com
Right after that they were added to Known Servers list with the online status.
We then validated the setup by sharing 1 case on each of the servers and logged in to User Dashboard on the server which we chose as single point of entry (http://connect.mycompany.com). User was successful presented with a list of cases showing three entries.
6.3.2. Intella Nodes
Intella Connect can make use of unlimited number of remote Intella Nodes to perform remote indexing. For installing and setting up an Intella Node please see Installing and starting Intella Connect/Node section.
Note
One Intella Node license is needed for each running Intella Node instance.
Using this view it’s possible to add/edit/remove remote Intella Nodes that can be used to perform remote indexing.
Make sure that remote Intella Node server is properly running and is directly accessible via network on particular IP and port.
Detected host name and port which can be used when adding new Intella Node can be found on the Intella Node’s local status page.
The IP address that is being detected by Intella Node can be just one of addresses on which that computer can be reached and it might not be always the best one to use. There are few examples that come to mind:
- your computer can have multiple networking interfaces, such as 1Gb/s TP (twisted-pair) ethernet network card and WI-FI network card. If you would connect both of those to different routers or switches, then your computer will be assigned two IP addresses and you can be reached by either of those. In this case you might want to use IP address assigned to the cable-connected network card rather than WI-FI as it might be faster. It could happen, however, that the IP address shown as detected is the one from your WI-FI network card.
- a router or switch to which your computer is connected can be configured to have multiple subnets. That means that the IP address and network mask will depend on the interface to which you are connected on that router or switch. Not much to do here unless you are also network administrator and you understand how the router was configured and how the computer is connected.
- your computer can be reachable on multiple IP addresses and ports even if you have just one network interface connected in your computer. For example: localhost:9999 or 127.0.0.1:9999 (also known as loop-back interface, which points to your own computer), 192.168.1.109:8082 (your local network on your directly connected router), 192.168.0.159:8081 (your company network on your second hop router), 85.74.198.115:80 (your public address). In this case you might want to use IP address which will make least hops on the route to server.
Please note that these are only simple scenarios and there can be much more complex network topologies and configurations. It really depends on what network you have and how it is built and configured. The detected IP address is being read from system configuration, it is not an algorithm that would detect your network and perform speed and reliability measurements to determine what exact address to use. It is meant to be a hint rather than anything else. When in doubt about which IP address to use, please consult your IT/network administrator.
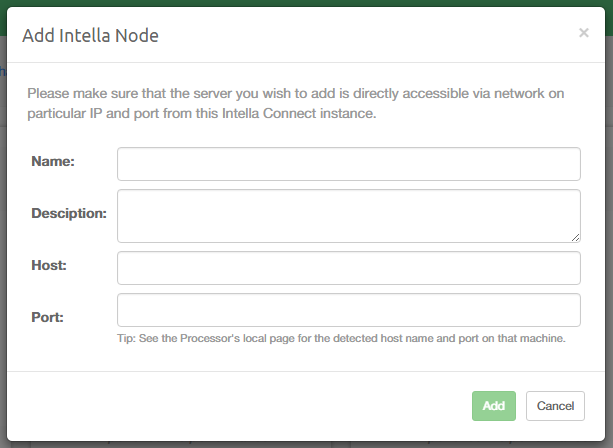
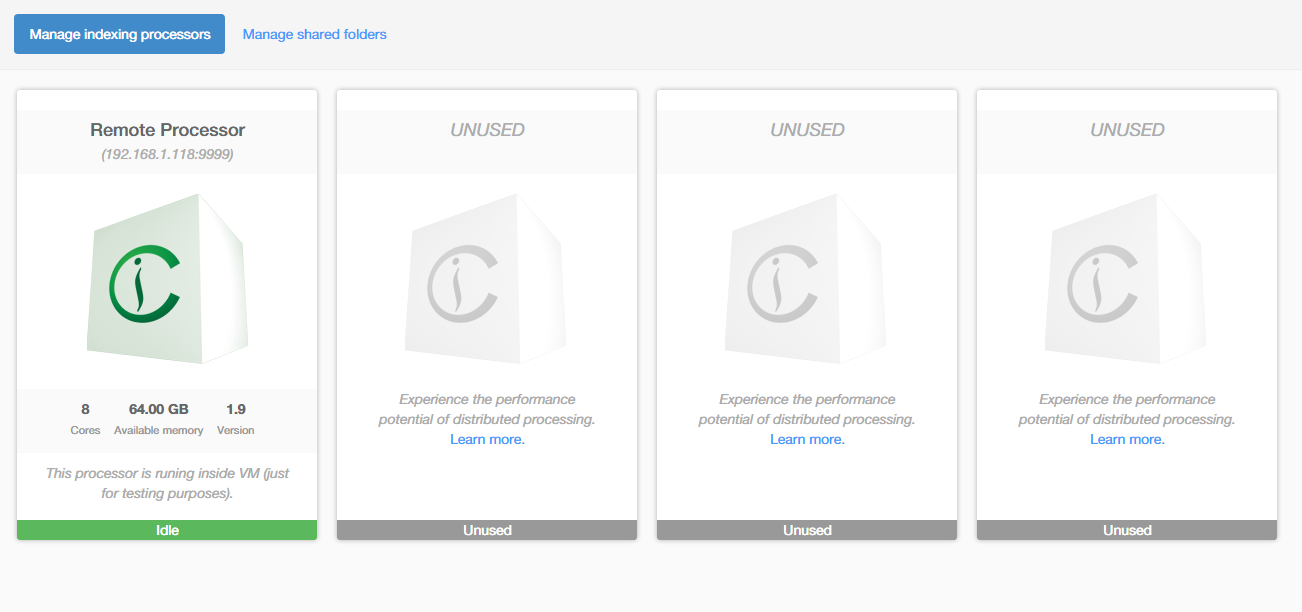
When you have gathered all relevant data (host, port) you can add new remote Intella Node by clicking
on the plus sign when hovering mouse over UNUSED remote remote Intella Node slot or by clicking on the
button Add Intella Node.
The Add Intella Node dialog will be shown.
Enter name, description, host and port. After pressing Add the Intella Node will show up in the remote
Intella Nodes list with status Connecting… which indicates that there is a check being made whether
remote Intella Node is up and running and is reachable.
If all entered data were correct and remote Intella Node server was reachable the status of the newly added Intella Node should be Idle which indicates that Intella Node is ready to be used for remote indexing. Connection error status indicates that server is not reachable. If that happens you should check whether:
- Remote Intella Node is properly running which can be done by opening it’s local page.
- Entered data (host, port) were correct.
- Remote Intella Node server is reachable from Intella Connect Server.
6.4. User management
This part is explained in the User management section.
6.5. Settings
This part lets the administrator configure certain aspects of Intella Connect server and external systems it may integrate with. It consists of five sections:
- General - controls general server behavior
- Branding - allows to add customized/branded logos to appear in several parts of the UI
- SSL - configures the server so that it uses secure HTTPS protocol for communication
- LDAP - allows integration with an LDAP compliant server (ex. Active Directory)
- ABBYY - configures an external OCR server
Each of these sections are further divided into smaller subsections and grouped by settings which affect similar features. For example, General section allows to configure Case sharing and default Admin password independently.
Each section of settings offers independent Apply and Discard buttons. Those buttons will became active once a change to settings is detected. A rule of thumb is that changes are not persisted unless you commit them by clicking Apply button.
Most of inputs render an auxiliary Information Icon which, when hovered over, will show additional hints about specific setting.
Important
Intella Connect will try to guard you from accidental loss of unsaved changes by showing a warning when you try to navigate away from the current view. In such case you should discard or apply your changes.
6.5.1. General
6.5.1.1. Case sharing
Changing server host
By using the checkbox Override server host in case URLs and text field Server host it
is possible to change how Case URLs are constructed in the Cases List screen.
Note
Overriding the server host only changes how Case URLs appear in the cases list. It has no effect on your networking settings. Depending on your network infrastructure such Case URL might still not be accessible due to the router configuration. For example, when you own a certain domain name, setting Server host field to your domain name will make Case URL point to your domain, but it might still happen that your browser will not be able to connect to that URL. If that is the case, contact your network administrator to resolve this issue.
Case auto discovery folder
This option allows you to make Intella Connect automatically discover cases available in a specified local disk folder. To enable this feature, simply enter an absolute path to the folder that might contain case folders.
Intella Connect will check this folder every 15 minutes to find new cases
(discovered by the presence of a case.xml file) and automatically add them
to the available cases list. It will also scan the disk each time that you
change this path.
For performance’s sake, Intella Connect scans files three levels deep starting from
the provided folder. You can increase this depth to any value you like
by adding the CaseAutoDiscoveryDepth entry in user.prefs file located in:
%USER_HOME%\AppData\Roaming\Intella Connect\prefs
To prevent access denied errors, Connect will by default skip scanning following folders:
$RECYCLE.BIN, System Volume Information.
You can specify path prefixes to exclude from scanning by changing the
CaseAutoDiscoverySkippedDirs entry in user.prefs file located in:
%USER_HOME%\AppData\Roaming\Intella Connect\prefs
Multiple path prefixes need to be separated by comma.
To turn off this feature simply change the path to a blank value.
Note
Disks are usually the main bottlenecks in hardware setups that we are usually dealing with. Adding a case usually happens rarely, so we do not recommend sacrificing even a tiny bit of a reviewing performance for it. Therefore we don’t encourage you to make use of this option unless it’s absolutely critical to your workflow. You can always consider switching it on and off depending on requirements.
6.5.1.2. Changing default admin password
This section allows to change the default password used by an admin account.
Current password
For security reasons, specifying the current admin password is required. By default this equals to ‘admin’.
New password and Repeat password
These fields represents the new desired admin password. Values entered must match in order to eliminate typographical errors.
6.5.1.3. Custom content
The Custom content feature makes it possible to upload Custom HTML content which makes it available to the users through link rendered on the login page.
Currently only single HTML content file is supported.
Enabled
Set this checkbox in order to enable this feature.
Label
Value entered here will appear as the name of the link.
File
This file will be presented to user once he clicks on the link.
6.5.2. Branding
Intella Connect can be partially or fully branded with a custom logo of your choice. The process of setting this up is pretty straightforward. It’s just the matter of uploading image files. You can also optionally align the logo appearing in the Intella Connect header, so that it appears in the correct location.
You can find more details on this topic in Branding section.
On login page
This logo appears on the login page, where user signs in to application.
In application headers
This logo will be shown in the Intella Connect header (top of the screen), as well as in various places inside the application’s User Interface.
Header logo alignment
By adjusting the value in this field you can control the vertical alignment of the logo located in the header.
Note
This feature will be enabled only for users having extended Intella Connect license. Please contact your sales representative for details.
6.5.3. SSL
Intella Connect supports protecting your server with a secure HTTPS communication layer. The details on how to set it up is a part of a separate guide available here: SSL setup.
6.5.4. LDAP
Intella Connect can be integrated with an LDAP server. This integration allows for the user base available in LDAP being used by Intella Connect. The details on how to set it up is a part of a separate guide available here: LDAP setup.
6.5.5. ABBYY
When you have access to an ABBYY Recognition Server, you can utilize it to OCR selected items in the case fully automatically. The configuration specified here will apply to all cases shared by this Intella Connect server.
Before attempting to configure this section, please make sure that your ABBYY Recognition Server is configured correctly:
- The Web Service component is installed.
- You can open the Service URL in a browser and it shows: RSSoapService. The following operations are supported….
Note
Currently only ABBYY Recognition Server 3.5 or 4.0 is supported.
Host
IP address of machine hosting ABBYY Recognition Server. The Service URL field will be populated automatically based on the entered value.
Version
The version of ABBYY Recognition Server installed. The Service URL field will be populated automatically based on the entered value.
Use custom service url
If you know that your server uses a different URL, you can override it by checking the Use custom service URL check box. This will cause the Service URL field to become editable.
Service URL
The value of this field will be automatically generated based on input in other fields. It should point to the appropriate SOAP service of the ABBYY Recognition Service.
Workflow name
Specify the workflow name that should be used. Alternatively, you can press the Get list from server button to select a value from all available workflows on that server. This button can also be used to validate connection to ABBYY Recognition Server.
Number of workers
Specify the number of workers to let the Recognition Server process more than one document at a time. The optimal number of workers depends on the Server capabilities (in particular the number of CPU cores on the server) and is also restricted by the server’s license (the number of CPU cores allowed to be used by the Recognition Server license). The number cannot exceed 64.
6.6. About
This part shows information about the Intella Connect version that is used.
It also allows to generate a report listing server diagnostics and usage over past 12 months. This information is often handy when resolving support issues or determining overall system health. The report can be generated by clicking on the “Generate report” button, after which report will be downloaded as a regular text file. It contains basic information about the hardware hosting Intella Connect, number of shared (and active) cases, memory distribution, number of active users etc. It does not include any confidential, case-specific data.
