The Intella Connect Dashboard is the administrative part of Intella Connect and enables the administrator to share cases, define users, view the activity stream from shared cases and modify the general settings of Intella Connect.
The left-side menu divides the administrative part into the following parts:
This part shows the list of cases prepared by the Intella desktop product. For each of the cases it also shows its status, which can be:
not shared: the case is not shared.
shared: the case is currently being shared and accessible to reviewers.
locked: the case is currently used by another Intella process, e.g. the Intella desktop application.
Note: A case can also be without a status, which means that it is not available. The reason for this can be that the directory where the case files used to be, is no longer accessible.
Clicking on a case shows its details on the right side, along with a set of buttons depending on status of the case:
If you have existing case on the disk which is accessible to Intella Connect, then you can manually import it to the available cases list. In order to do that you will have to provide a path to the Case Folder (parent folder of a case.xml file).
Click on the Add case button located at the bottom of the cases list. In the modal window, please type in the absolute path to the case folder. It’s the best to copy and paste it directly from Windows Explorer window. The server will then analyze provided path and if the case is found in that location, it will render basic details about the case. This is presented on the image below. If provided path is invalid, then appropriate message will be shown.

This part is explained in the User management section.
This part shows the activities and actions performed on a case by the reviewers that have logged in on it.
The Creator column shows the user that performed the activity, the Message column shows a description of the activity and Date column records the date and time the activity happened.
It is possible to view older activities by clicking on the more activities button.
This part lets the administrator configure Intella Connect. It is divided into three parts.
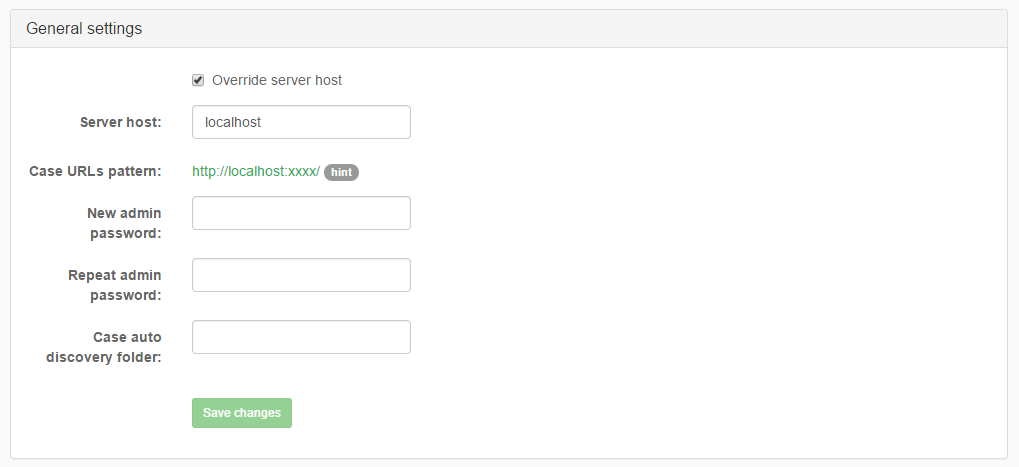
Changing server host
By using the checkbox Override server host and text field Server host it is possible to define the Case URL on which a shared case will be shown as accessible. The Case URL pattern is only informative and shows what the Case URL may look like.
Note: Overriding the server host only changes the Case URL to be in the form, which is described by the Server host field. Depending on your network infrastructure such a Case URL might still not be accessible due to the router configuration. For example, when you own a certain domain name, setting Server host field to your domain name will make Case URL point to your domain, but it might still happen that your browser will not be able to connect to that URL. If that is the case, contact your network administrator to resolve this issue.
Changing default admin password
The admin password can be changed using the password fields New admin password and Repeat admin password. The passwords entered into those two fields must match in order to eliminate typographical errors.
Letting Connect automatically find cases on disk
The last option allows you to make Connect to automatically look for cases available in a specified local disk folder. To enable this feature, simply enter an absolute path to the folder that might contain case folders.
Connect will check this folder every 15 minutes to find any new cases (judged by the presence of a case.xml file) and automatically add them to the available cases list. It will also scan the disk each time that you change and save this path.
For performance’s sake, Connect scans files three levels deep starting from the root (provided folder).
To turn off this feature simply change the path to a blank value and press Save changes.
Note: Disks are usually the main bottlenecks in hardware setups that we are usually dealing with. Adding a case usually happens rarely, so we do not recommend sacrificing even a tiny bit of a reviewing performance for it. Therefore we don’t encourage you to make use of this option unless it’s absolutely critical to your workflow. You can always consider switching it on and off depending on requirements.
Intella Connect supports protecting your setup with a secure HTTPS communication layer. The details on how to set it up is a part of a separate guide available here: SSL guide.
Intella Connect can be partially or fully branded with a custom logo of your choosing. The process of setting this up is pretty straightforward, as it’s just the matter of uploading a logo to our server and it will be automatically rendered in various places inside the application’s User Interface.
Note: This feature will be enabled only for users having extended Intella Connect license. Please contact your sales representative for details.
This part shows information about the Intella Connect version that is used.